Getting started
To get started with Sign.UseWise® Gmail add-on, you need to install it from the Google Workspace Marketplace as either Google Workspace administrator for the entire organization or as an individual user.
The main difference between these two options is that as an administrator, you can deploy the add-on for the entire organization and manage email signatures for the entire organization both on Gmail desktop and mobile phones but only if you also install Sign.UseWise® app – our solution for centralized management of email signatures in Gmail. Sign.UseWise® add-on complements Sign.UseWise® app by enabling centralized email signature set up on Android and iOS phones and iPads. Sign.UseWise® app and add-on, ensure brand consistency and effortless signature updates across your entire team. Learn more about how to install Sign.UseWise® app here.
As an individual user, you can install an add-on just for your account (Google Workspace or consumer gmail.com account), and you will have the option to use your existing email signature in Gmail settings on your mobile phone. The email signature will be added with the small banner at the bottom indicating that it was set up with the help of the Sign.UseWise® add-on.
Sign.UseWise® add-on – admin installation
To install Sign.UseWise® Gmail add-on from Google Workspace marketplace for your company or organization, follow these step
1. Open a web browser and go to workspace.google.com/marketplace.
2. From the Google Workspace marketplace search the Sign.UseWise® add-on listing or use this direct link to add-on. Make sure you are logged in with your superadmin account.
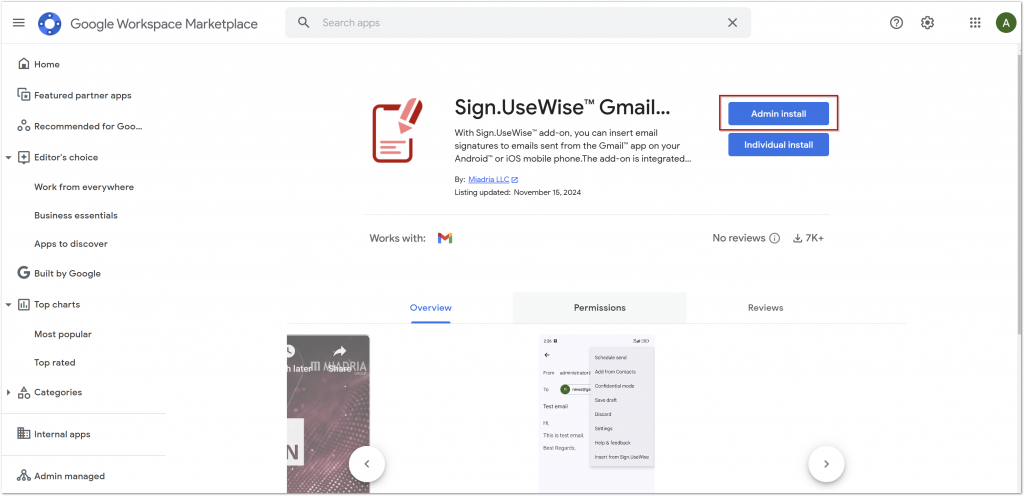
3. Select the option Admin install to start the installation and click Continue.
4. In the next dialog window, you’ll see the required scopes for the add-on to function properly. You can choose whether to install the add-on for the entire organization or for specific groups or organizational units.
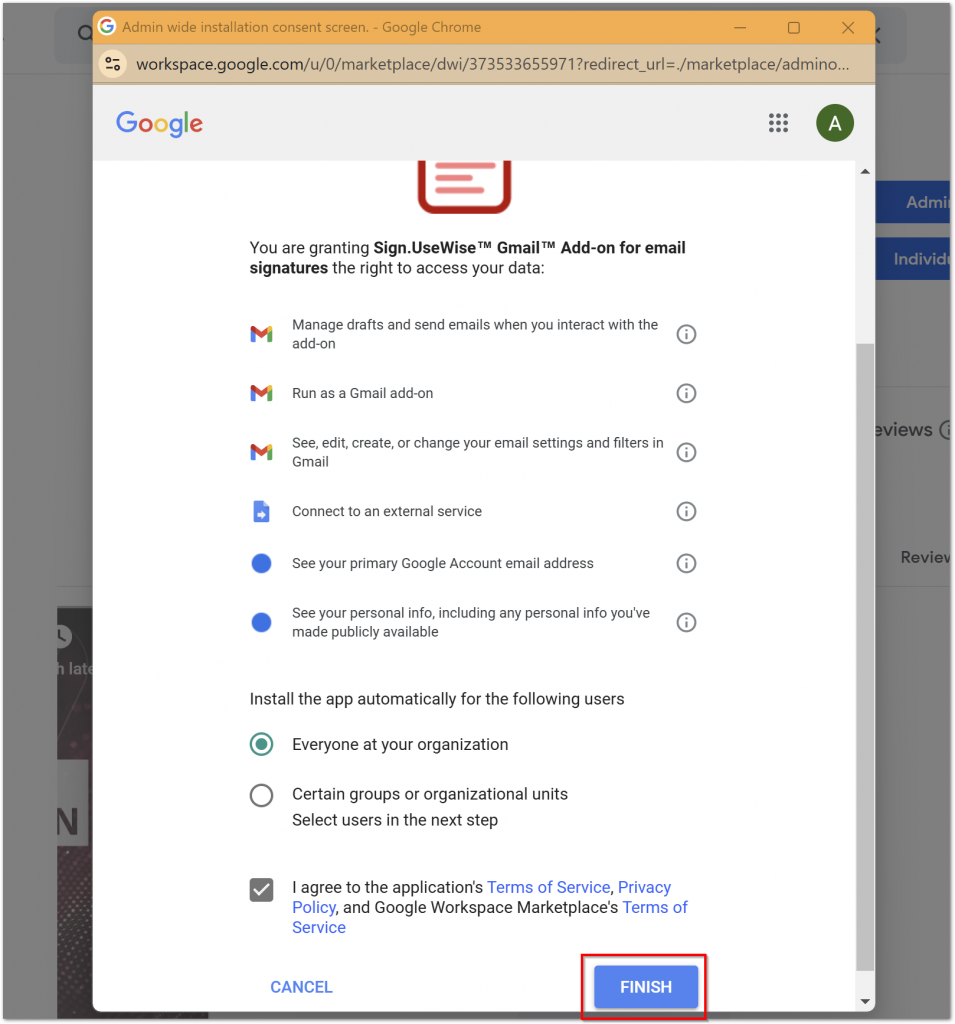
5. Once you’ve agreed to the terms of service, click Finish. The add-on is now successfully installed and you can start using it right away.
Learn more about how to use it on your Android or iOS phones in the following video guides – How to use Sign.UseWise® Gmail add-on on Android phones and How to use Sign.UseWise® Gmail add-on on iPhone.
Sign.UseWise® add-on – user installation
To install Sign.UseWise® Gmail add-on from Google Workspace marketplace, for just your account (Google Workspace or consumer gmail.com account), follow these steps:
1. Open a web browser and go to workspace.google.com/marketplace.
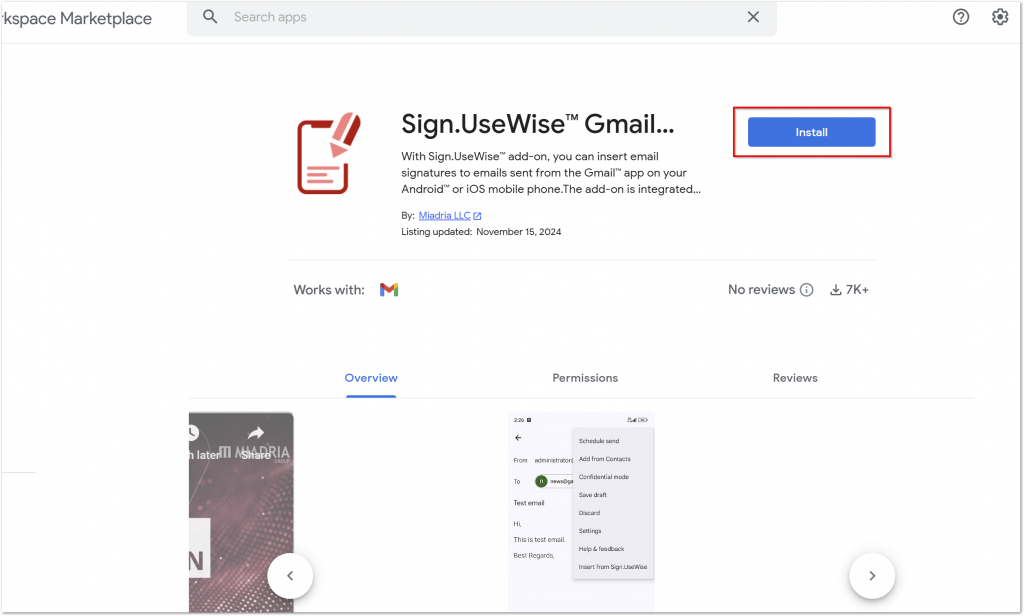
2. From the Google Workspace marketplace search the Sign.UseWise® add-on listing or use this direct link to add-on. Select Install.
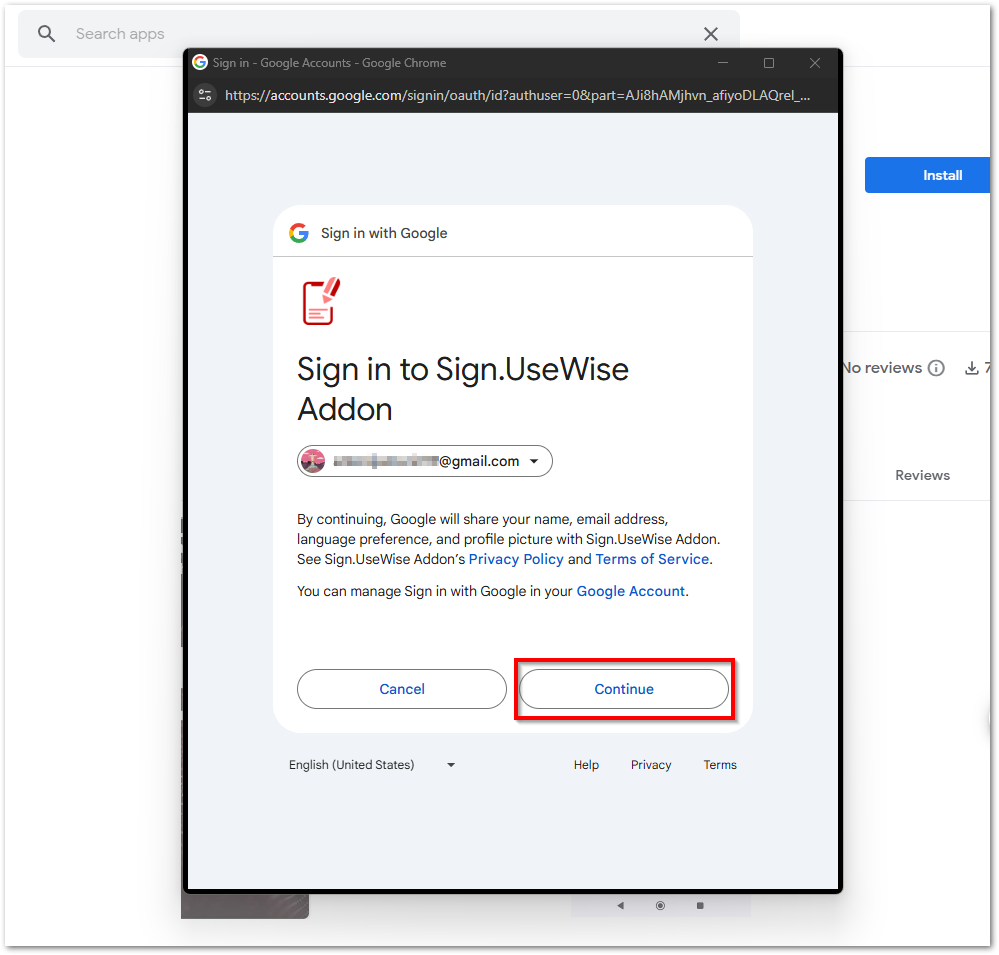
3. Choose the account on which you want to install the add-on. Click Continue.
4. The add-on requires certain permissions to access your Gmail account and manage your email signatures. You’ll be prompted to grant these permissions in the next step. Select Allow.
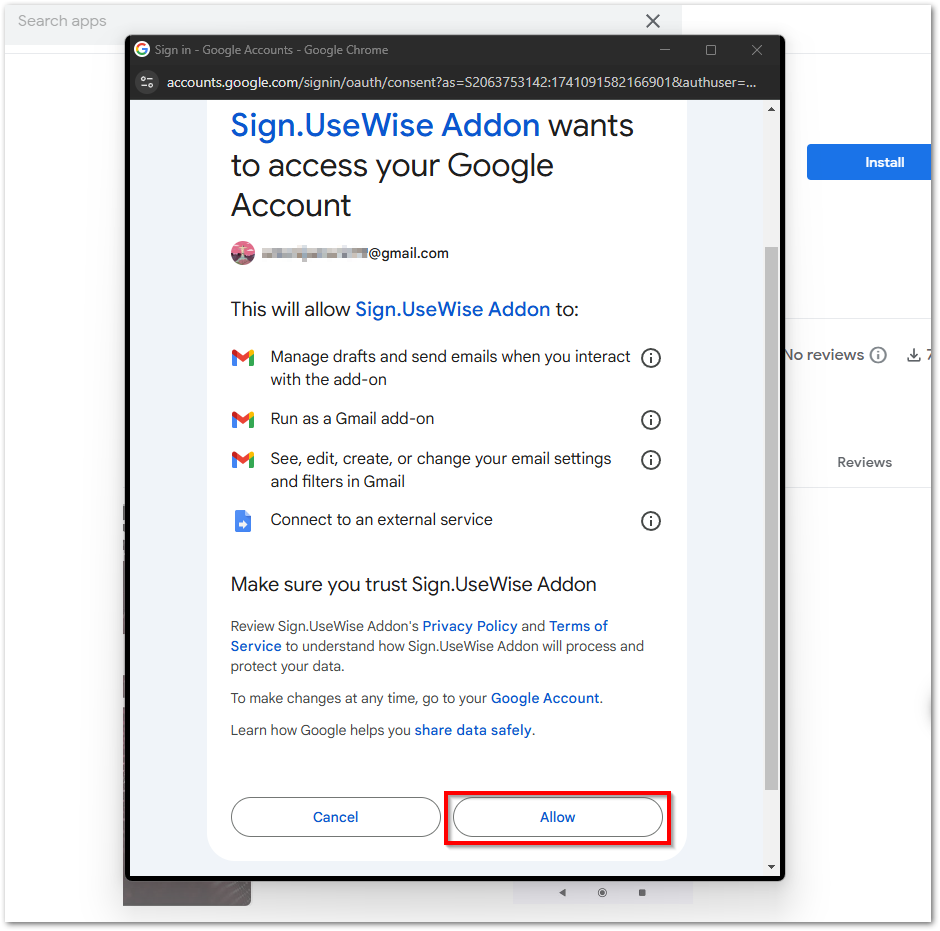
5. The add-on is successfully installed on your account, just click done on the dialog window. You can start using it on the Gmail app on your mobile phone.
Learn more about how to use it on your Android or iOS phones in the following video guides – How to use Sign.UseWise®Gmail add-on on Android phones and How to use Sign.UseWise® Gmail add-on on iPhone.
Insert signature with Sign.UseWise® Gmail add-on on Android phones
The Sign.UseWise® add-on lets you use the same professional email signatures you have in Gmail on your computer in the Gmail app on your phone. Your signature will be the same on your computer and phone, whether your organization uses Sign.UseWise® email signature management solution or you’ve set up a personal signature in Gmail settings.
Once the Gmail add-on is installed, you will be able to use it on your Android phone, iPhone, and iPad. See the next section for step-by-step instructions on how to insert your Sign.UseWise® signature in the Gmail app on your Android phone.
- Open the Gmail app on your Android phone, and start composing your email.
- Once you are done, select the three dots in the upper right corner and click Insert from Sign.UseWise®.
- Choose the address you are sending from and click Insert desktop signature.
- A signature will be added at the end of the email and you are ready to send it.
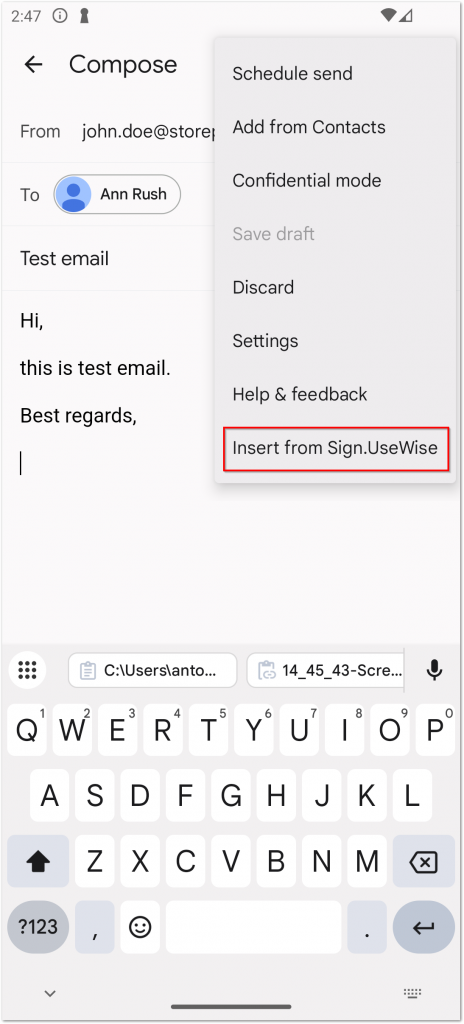
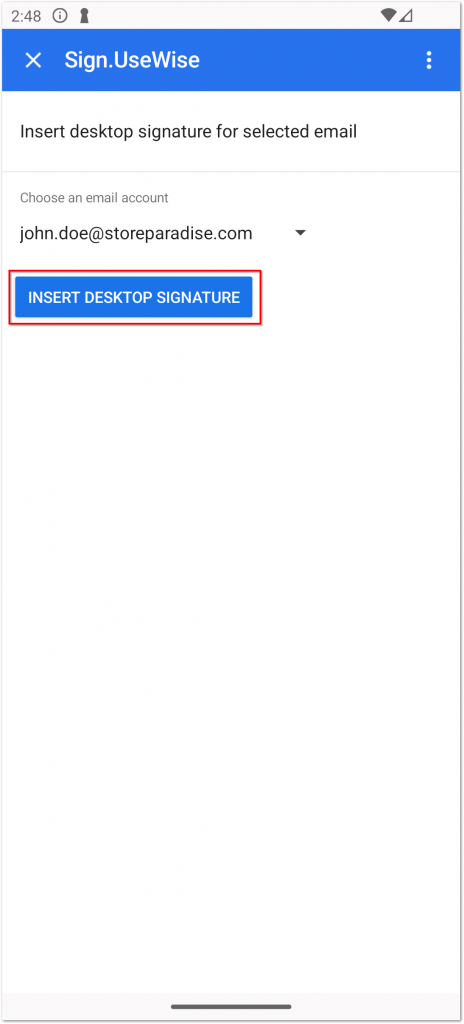
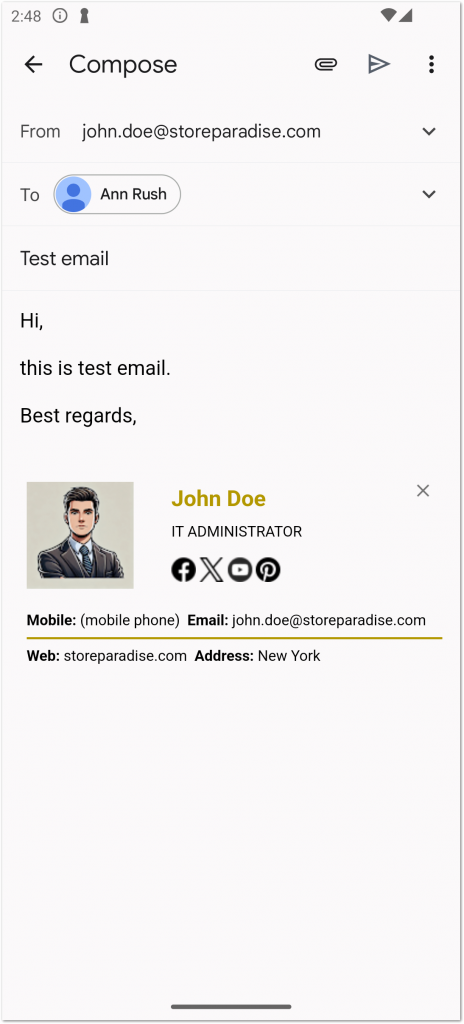
Here is the video guide on how to insert a signature Sign.UseWise® Gmail add-on on Android phones.
Insert signature for Send As address with Sign.UseWise® Gmail add-on on Android phones
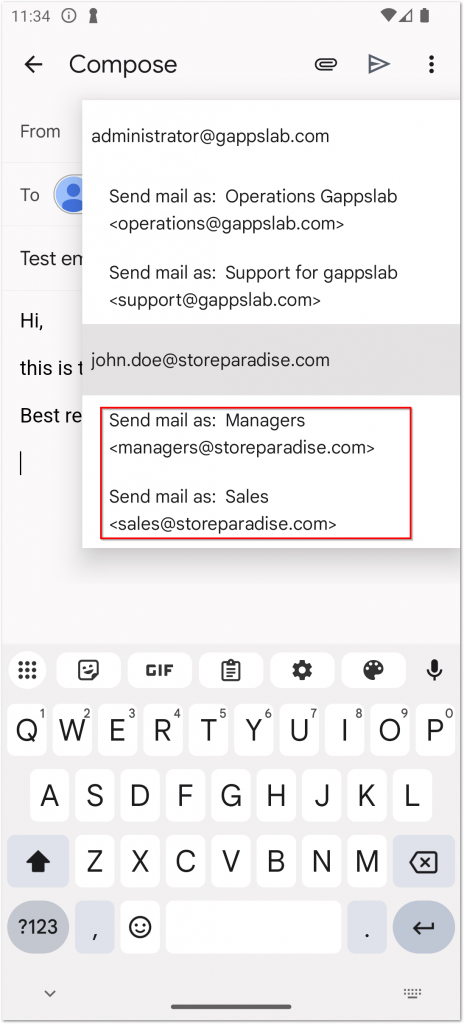
Sign.UseWise® supports setting signatures for different Send As addresses associated with your account. To insert a signature for another address, follow these steps:
- Open the Gmail app on your Android phone, and start composing your email.
- Choose which email address you want to send from by tapping the “From” field and selecting the address from the list.
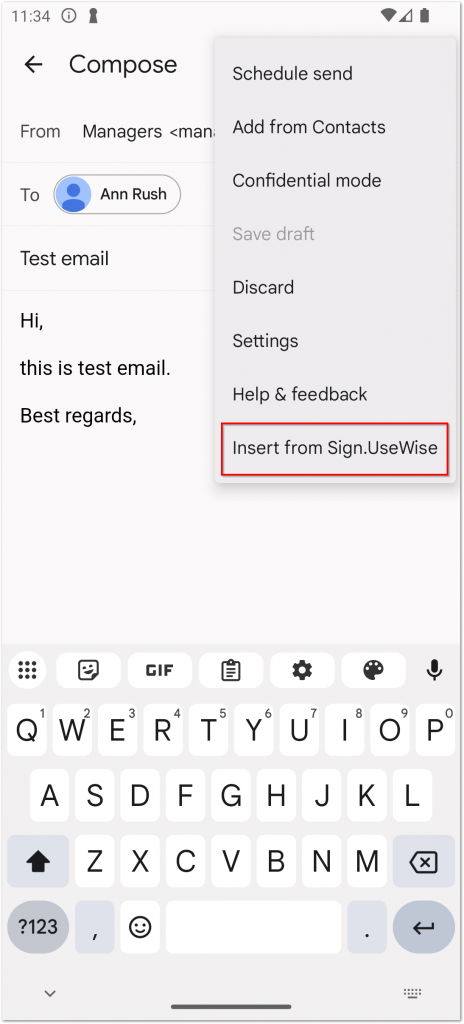
- Once you are done, select the three dots in the upper right corner and click Insert from Sign.UseWise®.
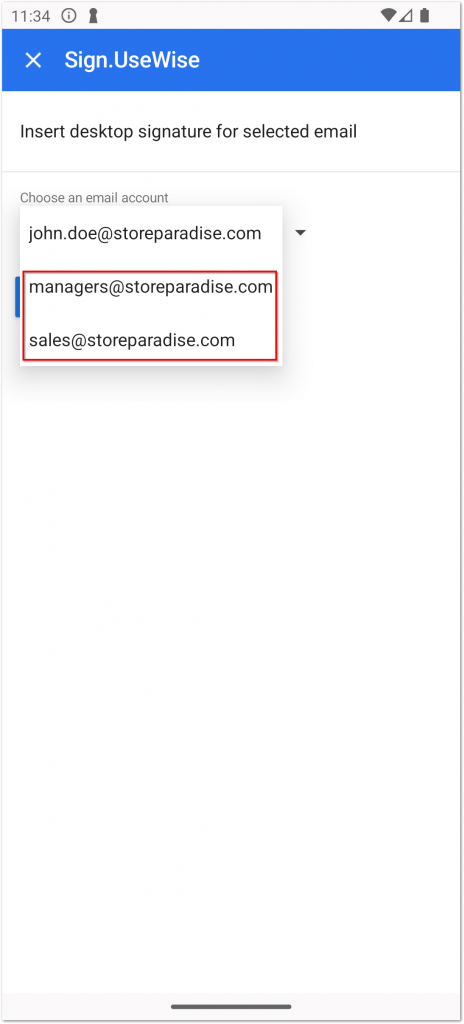
- Choose the address you are sending from in the drop-down list and click Insert desktop signature.
- A signature will be added at the end of the email and you are ready to send it.
Here is the video guide on how to insert a signature Sign.UseWise® Gmail add-on on Android phones.
Insert signature with Sign.UseWise® Gmail add-on on iOS phones
Gmail app on iOS phones automatically supports HTML email signatures. So if you already have an email signature set on your Gmail on the web, it will be automatically set on your Gmail app on your iOS phone. However, signatures for Send As addresses are not supported so that is where Sign.UseWise® Gmail add-on can help. The purpose of Sign.UseWise® add-on for the Gmail app on iPhone or iPad is to enable email signature set up for Send As addresses.
See the next section for step-by-step instructions on how to insert your Sign.UseWise® signature for Send As addresses in the Gmail app on your iPhone or iPad.
- Open the Gmail app on your iOS phone, and start composing your email.
- Choose which email address you want to send from by tapping the “From” field and selecting the address from the list.
- If necessary, first remove the existing signature by selecting it and deleting it.
- Once you are done, select the three dots in the upper right corner and click Insert from Sign.UseWise®.
- Choose the address you are sending from and click Insert desktop signature.
- A signature will be added at the end of the email and you are ready to send it.
Here is the video guide from the UseWise YouTube channel on how to insert signatures with Sign.UseWise® Gmail add-on – link to video.